How to use the HTML Cleaner?
Before telling you how to use it, we have to specify why you should use the HTML Cleaner. People prefer to compose content for their websites using Microsoft Word or other visual WYSIWYG editor, but all the time you copy text from this kind of program your code gets filled with unwanted messy code which affects not only the uniform look and feel of your website, but at the same time it's very unhealthy from the SEO's point of view. So it's very important for you to clean your code before publishing it online.
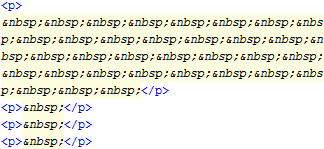
The main reason of this incompatibility is because people don't use Microsoft Word correctly: for example I've seen countless times people pressing the Space bar or Tab many times to set the text indents and gaps.

A common mistake to use
non-breaking spaces to shift the text
The user interface
Opening the HTML Cleaner you can see two input fields. A WYSIWYG editor on the left and a plain text editor on the right where you can access the source code. All the time you edit the content in one of these input fields the other one will also be updated so you can see the changes simultaneously.
Further down on the page is the control panel where you can set up the cleaning preferences. This is a list of checkboxes where we have collected the most commonly used operations a web editor might need. Once you click the big Clean HTML button, the checked operations are going to be executed on the current HTML source. Please find the detailed explication of all these on the home page of the website.
Next to the settings is the section allocated to the Find and replace tool. You can add up to 12 substitutions which will be executed once the other HTML cleaning operations have been completed.
Don't forget to back up your code before making the changes. This might be useful if the program doesn't work as expected.